 Wingware
Tutorial: The Tasks Tool

So far we've entered tasks directly into the Claude Code tool. In real work you may plan out tasks in the Tasks tool, often while you have one or more Claude Code agents working on other tasks.
The Tasks tool has several tabs: Plan, Execute, Review, and History. Tasks are entered on the Plan tab and then transition through the other tabs, depending on their status.
The Plan tab has two views: Goals and Tasks. Both show all the same tasks, in the Tasks view as a long list, and in the Goals view organized under one or more goals that you can create as needed.
Example goals might be Bug Fixes, User Accounts, Security Improvements, and each of those can have one or more tasks organized under it. For now, just use the Tasks view of the Plan tab.
Drafting and Queueing Tasks
Open the Tasks tool from the Tools menu, and in the Plan > Tasks tab click + New Task to add three new tasks:
- Add a /search endpoint that takes a 'q' query-string parameter and shows bookmarks whose title or url contains 'q' (case-insensitive). Add a search box at the top of /
- Filter / by tag when a '?tag=<name>' query-string is present. Make each tag in the listing a clickable link that applies the filter
- Add a "Delete" button next to each bookmark in the listing. Deletion happens via POST to '/<id>/delete'
New tasks start in draft mode and don't run until you queue them.
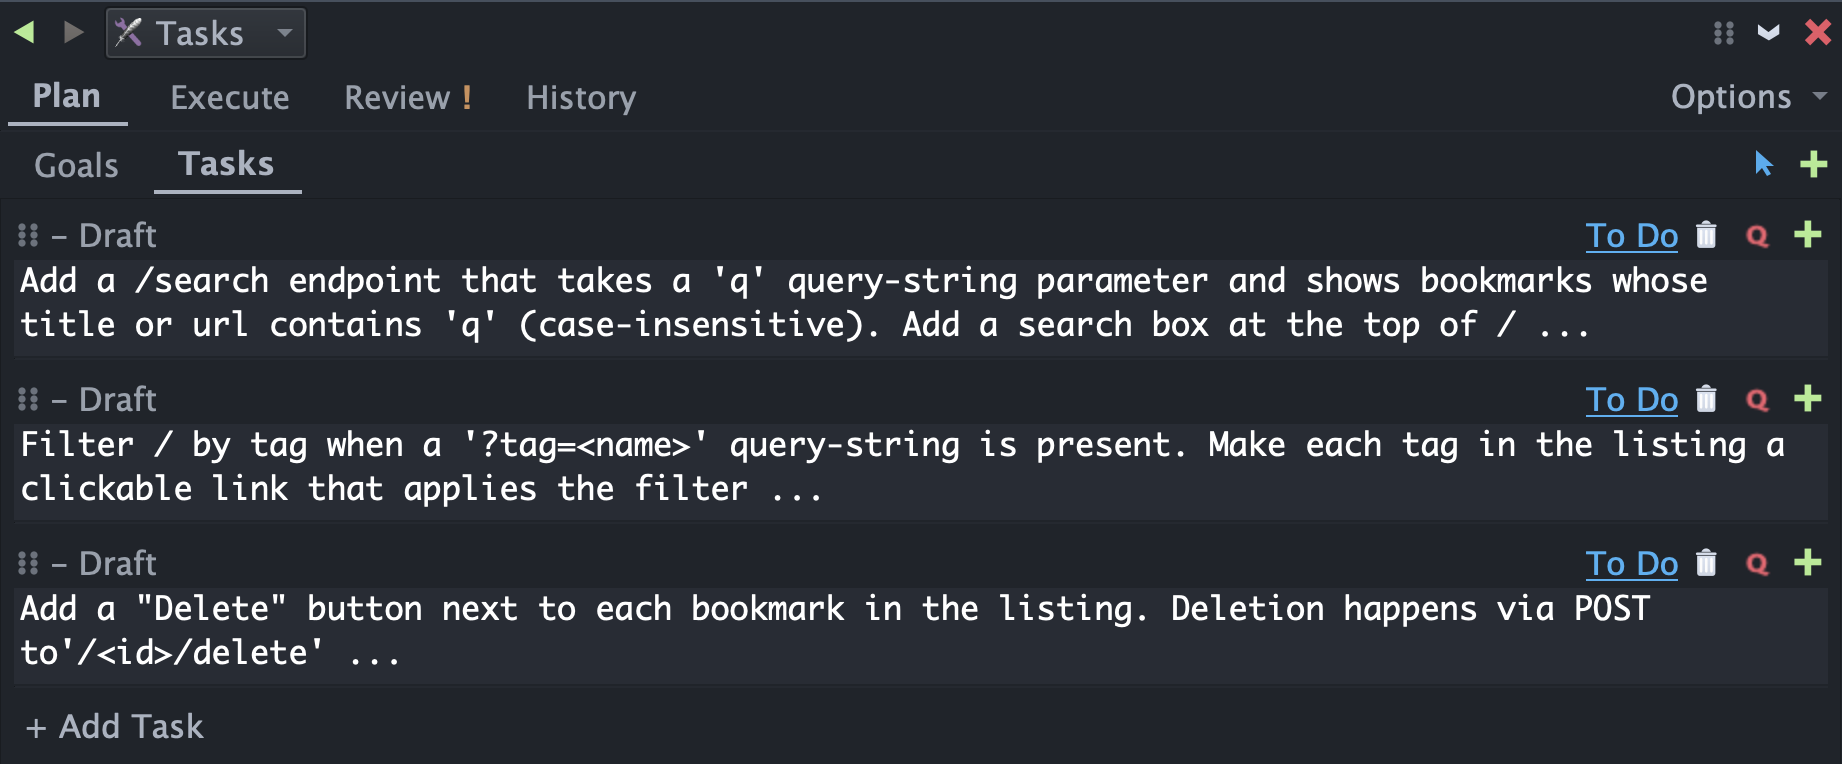
There are two ways to queue tasks: You can either click the Q button on each task to assign it to a queue, or you can use selection mode to queue multiple tasks at once. Once a task is queued, it moves to the Execute tab.
Since these are fairly simple tasks that are likely to succeed without asking for feedback or confirmation, let's queue and run them all at once. Click on the blue selection arrow icon in the top right of the Tasks tool, then Select All, and finally use the top-level Q menu to add them all to the Direct Entry queue, which is the queue Wing automatically created for the Claude Code instance that you have been using.
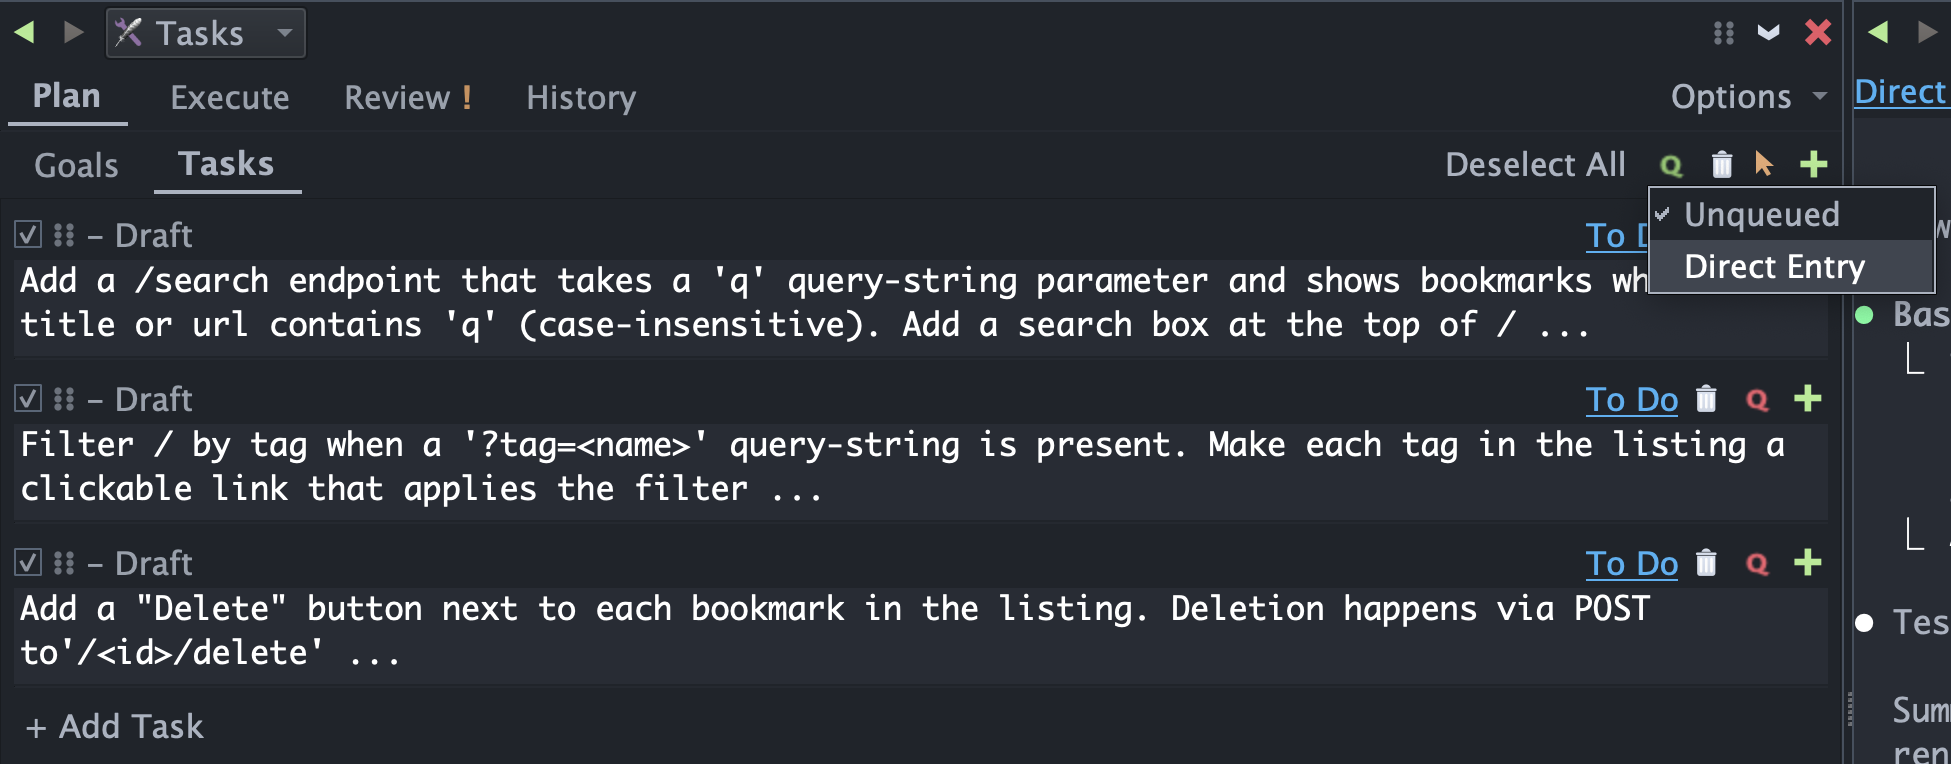
The tasks move to the Execute tab but don't start yet because the Direct Entry queue is paused. You can start them by clicking on the cog icon in the top right of the queue. Do that now but with Auto-advance unchecked so we can review the results before moving on to the next two tasks.
While Claude Code is working, let's look at the implications of running tasks in queues and potentially concurrently:
The Auto-advance option for the queue causes the queue to run the tasks in sequence, one at a time, until they all complete. Before doing that, you will need to think about whether each task is likely to complete successfully, rather than stopping to ask questions. For these three tasks, it's very likely they will just run to successful completion.
For tasks that may stop to ask questions, it may make more sense to turn off auto-advance or add additional tasks to another queue, potentially even running tasks in parallel. Before doing that, you'll want to consider whether the tasks are likely to modify the same files, leading to confusion and possibly loss of some of the work. An example that would work here in parallel with our three tasks would be to add a dark-mode stylesheet under static/. That could run in parallel in a second queue without conflict - different files, no overlap.
Keep in mind that if something goes wrong, you can always ask Claude Code to inspect and fix problerms, or revert changes from Wing's git tool or in the review process.
By now the first task you queued has probably completed and the task will have transitioned to the Review tab. Next tick on Auto-advance on the Execute tab and press the cog icon next to it. You will see Claude run through both tasks, one after the other.
After all the tasks have completed, open Project Properties from the Project menu, click on the AI Agent tab, and set Commit Mode to Wing presents commit message for review. Then go to the Review tab in the Tasks tool and press Commit Without Review. Wing should bring up the Git tool with a commit message pre-filled. You can edit it, or accept it as-is and press the Commit button to complete the process.
You can now reload the page http://localhost:5050/ in your browser to see the added Search field.